Create a Custom Nursery on a Budget

Is is just me, or are any of you other parents just flat-out uninspired by the nursery decor that most big baby retailers carry? I remember the excitement of starting to plan our nursery. I wanted something fun, colorful, original, and gender neutral. But that's a tall order when it comes to the selection carried in most stores. Not to mention the fact that there would likely to be a bizillion other nurseries out there that would look exactly the same. Which really doesn't matter, of course, but I enjoy decorating.

And this is what lead me to Etsy, which is brimming with all kinds of beautiful, custom crib sets and decor. Now we're talking! But the problem here? I didn't have a $500 budget just for bedding. So I had to get creative. And thus, the story and how-to of our much anticipated nursery-project-on-a-budget.

Step 1: Pick Your Theme
Search the internet for inspiration. Again, Etsy is wonderful, as well as other sites featuring nursery galleries, like Baby Lifestyles or Oh De Doh. This is how I came across our theme; Joel Dewberry's "Aviary" Sparrows in Almond.

Beautiful, right?! And there's a whole collection based on this print. Here's a few of the designs;
 And then I came across this handmade baby gift set being sold by The Red Pistachio on Etsy;

It was a little pricey (for me) at $75. I'd like to call myself "frugal", but to be honest, I'm just downright cheap. So, while $75 was more than I would usually ever spend, I decided to make this one splurge. After all, this is a handmade set, and this particular fabric collection was out of production. The Sparrows print was no longer available by the yard, at all. I knew I loved it and didn't want to start back at square one for a theme. So, to curb the $75 price tag, I cashed in $25 worth of debit card points, bringing it down to $50. Not bad! And as you'll see below, I got a lot of decor "mileage" out of this little set.

So, assuming you base your nursery theme on a fabric collection, your options for decor are limitless. As soon as I was ready to begin preparing our nursery, I ordered a few yards of some of the other Aviary prints. This also was a little pricey at about $7-$10 per yard, but I didn't need much, and again, this fabric set was my splurge. I think it helps to plan to spend a little more on a few things for the look you want, as long as you can plan to spend less on others. (More about how I did this below.)

Step 2: Purchase Your Nursery Furniture
You might already own your furniture, in which case, that's one less thing to do! In our case, we were starting from scratch. See the story of our furniture buying process here. If you don't have yours yet, consider what style will go best with your theme. I originally wanted a traditional white crib, but realized it wouldn't be ideal for the colors of our theme. So based on that, decided to go for an espresso stained wood.

Step 3: Assemble your Materials
So, once I got my fabric (about $50 for 6 yards), the real fun started! No, you don't have to be a sewing expert to do a few simple projects. In fact, you don't have to know how to sew at all. I'll show you the things I made, but there are plenty of creative no-sew ways to use beautiful fabric as decor. I also picked up some very inexpensive craft and storage items from Joann and Hancock Fabrics.

 Here's the spread!
 Felt ($7), wooden bird houses ($3 total), plaques ($3 total), and an "A" ($1), spray paint ($6), piping ($1)...Oooooo the potential!
And here are acrylic craft paints ($3 total), colored embroidery thread ($.90 total), and ribbon ($4 total).

Total Cost for fabric and all craft supplies: roughly $80 + $75 Etsy gift set= $155

Step 4: Sew & Craft, Scour Thrift Stores, then Put it All Together!

First take a look at the finished areas of the room, and then I'll break it down piece by piece to show you how I DIY'ed, repurposed, saved money, and had a blast creating my dream nursery!

                   - - - - - - - - - - - - - - - - - - - - - - - - - - - - - - - - - - - - - - - - - - - -

I made the window valence with a half a yard of Aviary fabric, I made the crib skirt with muslin I already had on hand (about 3 yards), and I sewed a cover onto a plain white crib bumper that I found at a thrift store for $1 (don't worry, I washed it well!). The blanket hanging over the back of the crib came in my Etsy gift set, and I made the three decorative pillows using my fabric and batting. The crib sheet was on clearance at Target for $5, and the sheet protector was $3 from a baby consignment sale. I snagged the brown rug from our kitchen. Total cost: $9

These shelves are actually CD storage crates from Joann, and they're $5 each. Brown fabric is taped to the backs. The little bird came from a thrift store for $.25, I already had the white frame (originally gold, but currently spray-painted white), and the pine cones came from the ground outside! Total cost: $5.25

The hanging bird art was from a thrift store for $1.50. I painted over it with colors to match our theme using the same acrylic paints. The brown paper behind it was from Hobby Lobby, about $.25. The large frame was something I already had. Total cost: $1.75

                                                     
This is a wooden fruit holder that I picked up from a thrift store for $3. I liked how the stain and style matched the wooden crates from Joann. I hung it with ribbon, and then hung two of the burp cloths that came in my handmade Etsy gift set. Total cost: $3

                      
                  - - - - - - - - - - - - - - - - - - - - - - - - - - - - - - - - - - - - - - - - - - - -

                     
The two mirrors behind the changing pad came from the thrift store for about $2. We already owned the floating shelves. The two hanging pieces behind the Aviary basket on the bottom shelf are frames that I already had covered in leftover fabric scraps. The basket holding diaper supplies was a gift. Total Cost: $2.50

I found this orange lamp from a thrift store for $8, brand new and still in the original package! And get this, I saw the same exact one at Target a week later for $16. The small frame also came from a thrift store for about $.50. The sweet pea rattle was a gift, (and is now the prop used in the baby's weekly photo). Total Cost: $8.50

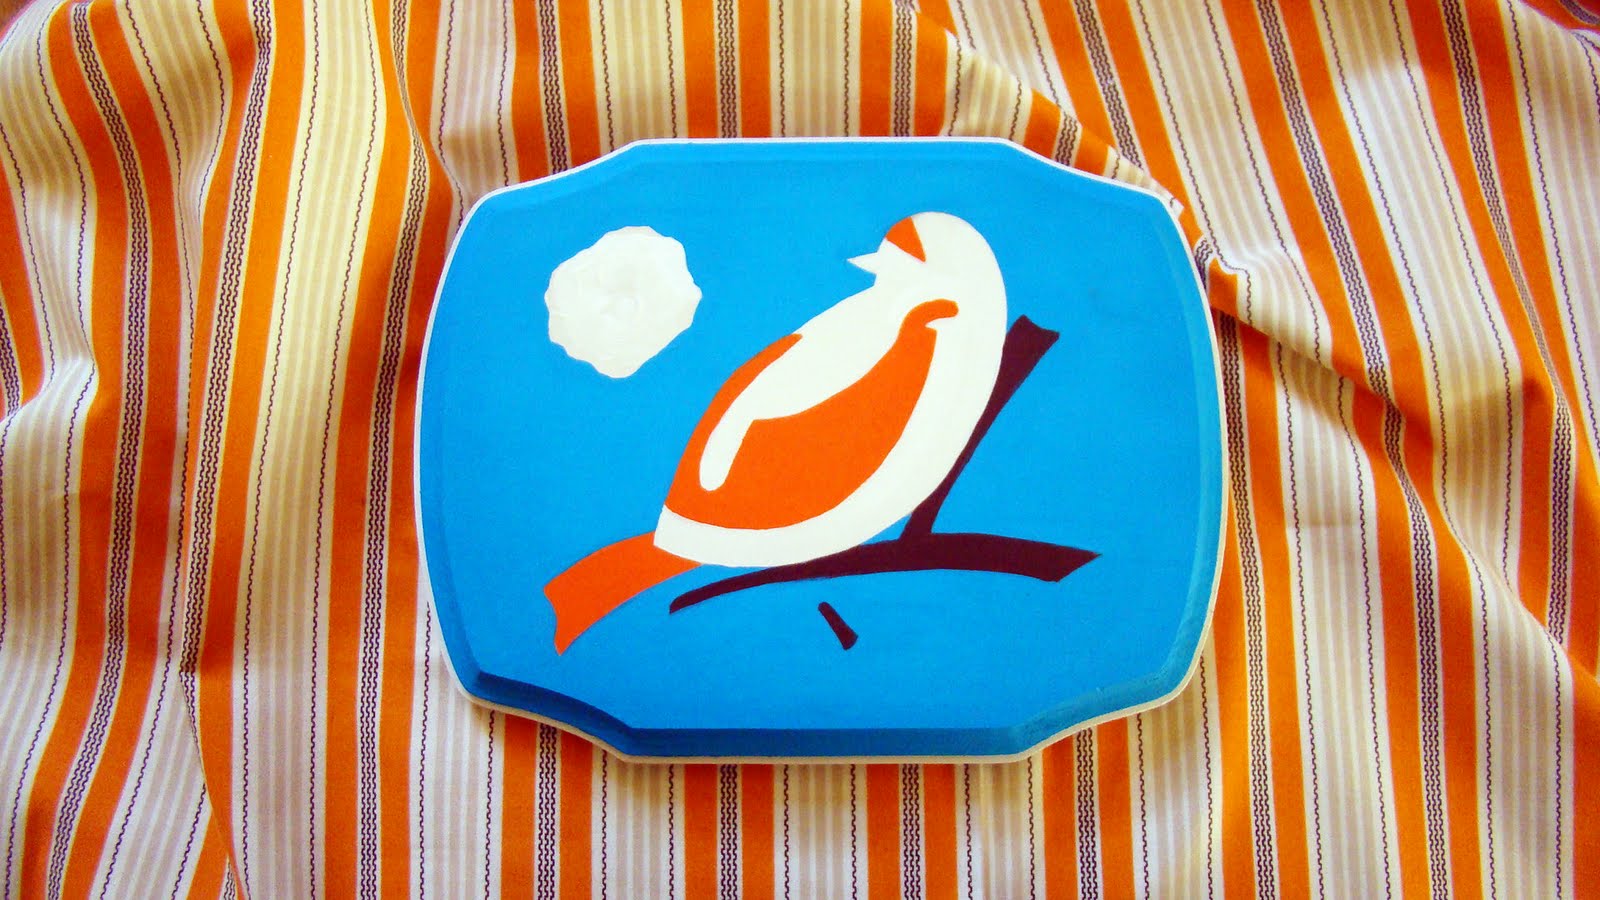
I bought these wooden plaques from Joann for about $1-2 a piece, as well as three acrylic paint colors for about $1 a piece. I already had white paint and brushes. I painted these by hand, but you can use stenciling also. Total cost: $10 (Note: This cost is accounted for with the rest of the craft supplies above.)

I framed leftover scraps of my Aviary fabric using frames I already owned. The orange paper came from Hobby Lobby for about $.50.The spray-painted branches came from the ground outside, I already owned the vase, and the little whimsical round pieces I added to the branches came from the thrift store for $.30. They were originally some sort of gold curtain hangers that I spray painted orange. Total cost: $.80

The blue paper, again, came from Hobby Lobby for $.50. The wreath also came from Hobby Lobby for $1. I made the little bird with ribbon, felt, embroidery thread, an Aviary fabric scrap, and a button I already had on hand. After the craft supplies that I already accounted for above- Total Cost: $1.50 (2)= $3 for two bird wreaths.

This "A", once again, was $1, as well as the paint used to paint it. And this rustic, eclectic pillow was $.50 from the thrift store ($1 for two, the other one is sitting on the espresso shoe rack you'll see below). Total Cost: $2.50        
         
                  - - - - - - - - - - - - - - - - - - - - - - - - - - - - - - - - - - - - - - - - - - -


The shelf, $1, and shadow box frames, $1.25 each, came from a thrift store. I spray-painted the shelf orange, and spray-painted the frames khaki. In the frames are three washcloths that came in my Etsy gift set. I made the pillow using fabric and stuffing that I purchased. Total cost: $4.75

I bought the hanging wet bag from Etsy for $20 (another one of my splurges). From the thrift store; the little baby carriage for $.50, the decorative pillow on the right, two for $1 (the other one's on the floating shelf), and the small green and yellow cow art for $.30. The two wooden "shelves" are actually stackable crates from Joann, for $20. We already owned the espresso colored shoe rack on the bottom- it matches the crib set perfectly! Total Cost: $22 (Oh, and I can't forget the rolled up Moby wrap on the shelf! That came from a baby consignment shop for $20- half price.)

                  - - - - - - - - - - - - - - - - - - - - - - - - - - - - - - - - - - - - - - - - - - - 

 These came straight off of the ground. Total cost: FREE!

This bib came in my Etsy gift set. Too pretty to use, right? Why not display it?

   - - - - - - - - - - - - - - - - - - - - - - - - - - - - - - - - - - - - - - - - - - - - - - - - - - -

Step 5: Basque in Satisfaction!
So, what was the total cost of all the fabric, craft supplies, and decor items? $214.35. But to account for little things I might have forgotten to add, we'll round up a little.

So.....let's say the total cost was $230.

Not bad, right? Considering that the custom bedding alone (from Etsy) would have cost me $400-500. And don't forget the $25 debit rewards cash I used, which really made it closer to $200.

If you're like me, you're probably tempted to think that $200 is still a lot. Well, look at it this way, I've got a gender neutral nursery that can be used for all of our children. Let's assume we have three (if Thane asks, tell him I said two). So, $200/3 kids= $67.
So, I have good news for all of my fellow penny pinchers; your dream nursery is possible! It's amazing what you can do with a little resourcefulness and creativity (or should I say a drive based on the fact that you're not willing to spend any money, ha!). And most of my ideas were by no means original. I just did a lot of internet surfing to find things that I liked, and then figured out how to "make them my own" using what I had or what I could get cheaply.

As always, I'd love to hear what you guys have done to save money on your decor. Don't hold out on me! And if you'd like more specific how-to instructions on any of these projects, please don't hesitate to ask!

Happy decorating!

Hooray, We Ordered our Crib Set!

The story of our crib set, originally posted to the baby blog on November 26th, 2010-

We finally found our crib set! And what a relief, after months of meticulous searching and debating. I never imagined it would be so hard... Thanks to GG, we didn't have a strict budget. So it was really just a matter of choosing a set with the style and features we wanted. Sounds pretty simple, right? NOPE. Not for me at least. I've probably stared at every crib and crib set on the market. I spent countless hours shopping online and went to all the big baby retailers as well as the small independent ones. It was always the same- if I found a crib I loved, it didn't come in espresso. If it did come in espresso, the matching furniture pieces weren't great. (We wanted a set with real furniture that our kids would be able to use all growing up, nothing too specifically "baby"). If I found an entire set that I liked, it turned out to be made of really cheap particle wood or had bad reviews. We thought about getting a high-end set with two pieces (rather than three), but the thought of buying baby furniture that was fancier and more luxurious than our own adult furniture was just too absurd. And of course we wouldn't have felt right about stretching GG's pocketbook that far.

Anyway, long story short, here it is! The Graco "Lauren". And you'll never believe where we got it (well, if you know me, you will, ha!) WALMART.com! NOT the place I anticipated buying it, but Walmart actually sells all of the same cribs as the other online baby stores, but for less. As far as the look and the quality, it was the best overall value out there. And whether or not we eventually convert the crib into a full size headboard, our kids will be able to use the dressers until they've fallen apart- which hopefully won't happen for a long time!


This Graco "Lauren" crib was only $139, and it came with a free mattress when we ordered it. We returned the free mattress (and actually got $25 back for it, even though it came "free") and bought a higher quality one for $75. OH, and it's a convertible crib, with the conversion set already included.
This Graco Combination dresser is currently $271.96, and comes with a free changing pad. It works great as a dresser/changing table combo, and alleviates the need for any additional drawer space in our small nursery.
This Graco 4-Drawer dresser is currently $249.99. We don't have space for it in our current nursery, but we'll be able to put it to use sometime in the near future.

_ _ _ _ _ _ _ _ _ _ _ _ _ _ _ _ _ _ _ _ _

So, let's total it up: The cost of the three pieces of furniture was $660.95. Then, we got $25 back when we returned the free mattress, and then spent $75 on a better one. So, ($660.95-$25) +$75= $710.95

And does anybody want to guess how much shipping from Walmart.com was? Not only for these three pieces, but also for the free changing pad, the free mattress, and the Pack 'n Play that we ordered at the same time? Get ready..........$7! I'm not even joking. Holy-cheap.

And thanks to GG, our total out-of-pocket cost was $0! With such nice help from family like this, it freed up our budget for nursery decor.

Since I mentioned the Pack 'n Play.... we finally ended up ordering this rather than a regular bassinet or co-sleeper. It's a bulkier piece than I wanted, but it should be great for long-term use. Especially considering that we'll probably have a bigger than average baby if genetics has anything to do with it.


Can't wait to start setting up the nursery!!! Up next: infant car seat, cloth diapers, breast pump, baby carrier, and more.... Oh boy, here we go again! :)

Color Your Bible

No, I don't mean doodle during church. (Unless it helps you stay focused on the message. Sometimes I'm tempted to draw on the sermon notes, but Thane will invariably give me a strong elbow and/or the evil eye to get me focused again. Thanks honey.)

Anyway, back to the point of this post, which I've yet to spell out; bible study. More specifically, motivation to continue/start bible study. Surely I'm not the only one out that there recognizes the vast importance of the Word of God, yet struggles to stay in a disciplined daily routine of reading it and striving to live by it. And might I add, enjoying it? It's such a blessing. It's literally (no pun intended) God's love letter to us, full of truth and wisdom and comfort. There's nothing more encouraging than reading about His love for us, wretched as we are, and to be able to identify and emphasize with the experiences of the saints, both joyful and sorrowful. Spending thirty minutes or so a day with God and His Word is like an energizing breath of fresh air. It keeps us close, and there's nothing better than intimacy with Him.


So then, why is it so hard to make the time to sit down and read each day? Probably my tendency to make idols out of everything but the true God, in accordance with the usual pattern of sinful human behavior since the beginning of time. There's always something to distract me, whether it's the TV, or the internet, or the dirty dishes in the sink, or the laundry, or this blog, ha! But, that just goes to show you that if I'm willing to make time for all of that stuff, surely I have time for God. It boils down to priorities, and I'll be the first to admit that it's a real struggle for me to keep my priorities in the right place.

So, I wanted to share with you my best attempt at keeping an engaging, fulfilling, continual practice of spending time with God in His Word. Hopefully this encourages some of you guys to keep going in your bible reading, or to start if you haven't been in the habit of doing it. I sure could use the encouragement sometimes!

So here we go... I'm not sure where I first got this idea, but I guess I've been developing it for a number of years and I've done it throughout a couple of Bibles so far. All you'll need to follow along is an assortment of colored pencils and your bible (one that you don't mind marking up).
                      

First thing's first; if we're going to be spending time reading God's Word, we want to get the most out of it that we can, right? There's no point in reading it just for the sake of "checking off the box" or in attempt to please God merely by the "work" of doing it. After all, these things don't impress Him- He wants a true, intimate relationship with us. And using the Word that's He's so graciously provided, we want to be continually growing in knowledge and understanding. So, we need an effective study method!

And this is mine- underlining key points of Scripture according to a color system so that I'm actively searching out the various themes and elements of the Word as I read. Take a look at this first example;

It's hard to tell from this photo, but there are two colors being used, as well as the circled "4". "Thus says the Lord..." is underlined with gold, to designate that it's God speaking. And "Seek Me and live" is underlined with green, because that's a command. (More on the circled "4" later.) Why these colors? No reason, they're just what I happened to pick. The point is that now I can open to this page of my bible and very quickly and easily know what themes are on this page- God is speaking, and He's calling us to do something. And since I found it worth underlining, I know it's something important that I don't want to forget.

Here's my personal color scheme. The fun thing is you can pick whatever colors you want, and whatever categories you want. And of course you can continue to add colors and categories as you go.
You're probably not interested in the nitty-gritty details of my extremely complex notation system, but I'll point out a few things just in case.


More green and gold (Jesus is talking here and I don't have a red-letter bible). Note the circled "I am". Anytime I circle something, it denotes an action, or verb, or something really powerful. And you'll see that the "4" is circled in gold- that means that it's Jesus speaking and giving a commandment- two categories at once. So, since I can only underline with one color at time, I chose green to indicate the commandment, but circled the verse in gold to remember that's it's Jesus' words. I know, super nerdy.

Here you'll notice a little pencil circle around the "8". This means that I've written a note about verse 8 in the margin. You'll also notice what looks like parenthesis around some of the words or phrases. I do that to anything that stands out but isn't necessarily an action or verb (which would get circled).


There's some purple! Plus a circled action word, some parenthesis, and a smidgen of a note in the margin.

I use Prismacolor colored pencils. They're expensive, (a little over a dollar a pop if memory serves me right) but they're wax based so they're very vibrant yet gentle on the delicate paper that's in most Bibles. You can buy them individually at any craft store like Michaels or A.C. Moore, which means you can customize a color scheme without having to buy a whole set.

So there you have it, my method for effective, engaging bible study that helps me to learn the Word and commit it to memory a little better than I'd otherwise be able to. Sometimes I like to just flip through the pages of my Bible and see all of the colors and notes (and, I'll admit, smell the paper even though it's not new anymore, haha! Thane catches me doing this every now and then). Anyway, marking up my Bible really gives me a sense of ownership over it, and helps me to get the most out of my study and time with God. And that's really satisfying!

Anybody have any different methods? Do tell! I'm a Bible geek at heart, and I'd love to hear about them!

We Found Them!

You might remember my post about the really neat pair of mounted horns that I fell in love with in a Georgia thrift mall (and my ensuing interest in ranch-inspired decor), only to return and find them gone, to my great dismay. But in the wake of my regret over not snagging them when we had the chance, I promised that I wouldn't give up, that the search would continue...and hooray! We found these! Except this pair is bigger and nicer than the first ones we saw. And brand new, as opposed to used. Fireplace, get ready, you're about to be adorned.

Please ignore the yucky hotel-room carpet. I had just enough time to snap a few pictures before they got toted off to the ranch via the spacious Excursion (Thane's parents stopped off in Kentucky for a visit and did us a huge favor by taking them back for us since they barely fit in our Escape).

Anyway, in case you're wondering where we found this set, I spotted them in a Kentucky antique mall about a month ago. Of course I immediately got excited just to see another pair similiar to the first ones I liked, but if we were hesitant to spend $60 on the first set, I knew we wouldn't spend $325 on these, which was the cost. So, I reluctantly put them out of my mind even though they could be worth the money, depending on how you look at it. For instance, $325 wouldn't be much for a beautiful painting, but since I'm painter, we'll probably never buy art. Therefore, we could put a decorative item like these horns in the same category as an art purchase. Afterall, they're something we'll always have and enjoy. But regardless, the fact remains that we never would have shelled out $325.


So, how did these end up in our living room? Well, I'd been bugging Thane to take me "antiquing" for a while. Lately I've been in this mode where I've wanted to find old pieces of wooden furniture to fix up, even though we have no house here and absolutely no space to move anything back to Georgia. But I can still dream, right? So, we went back to the antique mall where I originally saw the horns.

I couldn't wait to show them to Thane and told him how awesome they were as soon as we entered the store. Well, just imagine my intruige upon entering the "Western" room and seeing a sign that read "75% off of entire collection". What?! Were the horns a whopping 75% off? Could it be true? We asked, and to my great surprise and excitement, they were. This was the golden ticket of opportunities, we'd have been fools to pass this one up. So, up to the counter we carried them. And instead of $325, we paid(drumroll)...................

$84! Is that a steal, or what?!

Brambles is checking them out. She knows there's something suspicious about them. I wonder if that means they're real? We didn't think they were, but Thane's parents did. And they do come from Fort Worth, Texas, so you never know.

So, one day in the (hopefully) near future, not only will our fireplace be finished, but these horns will be proudly mounted above it. They're about six feet long, so they should flank this five foot fireplace very nicely.

Thanks for tagging along for my latest search-and-find mission. What about you guys? Have you had your eye out for something special that you've yet to find? Or, have you had any similar search-and-find success stories lately? You know what they say, the thrill of the hunt is half the fun!

The Kitchen Plans

Just like choosing our paint colors, here's a look at another exciting yet long and tedious part of our home building process; planning the kitchen. In other words, the beast of all projects. Since the kitchen is "the woman's domain" in our household, Thane put the bulk of the planning on me (thanks and no thanks!). But thank goodness I've had four years to hem and haw over this. I'm not exactly known for my quick or assertive decision making skills (except when it came to our stairs, a fluke occurrence.) Throughout all of this crazy house building, one thing I've learned about myself is that I always come back to the original idea. I just like to painstakingly explore every single other option out there before pulling the trigger.

This photo was the original "inspiration kitchen" I picked at the start of our planning four years ago.

Oh espresso, you get me every time! There's something so warm and rich and coffee-esque about it. (I guess that's why they call it "espresso"). Is it just me, or can anyone else hear this kitchen saying "come, relax, enjoy a big mug of coffee in me"? So, with this photo in hand, we got quotes from two different custom cabinet suppliers; Showplace Wood and MidContinent Cabinetry. We had two people (representing the two companies) come out to the house to measure the kitchen and plan out the cabinetry, and we had blueprints drawn up to show the exact wall and cabinet measurements.
                              
We went with MidContinent. The blueprints are important, but yawwwn, not very fun to look at. Never fear, there's more! Here are the very fun 3-D drawings of our cabinet and appliance plan. We chose the Concord cabinet style in espresso-stained maple.

Some fun features include dove-tail, no-slam drawers (sorry Asher), a Lazy Susan, and pull-out storage containers in the lower cabinets. These "containers" are wood and take the place of a standard stationary shelf so that you have easy access to all of your items and prevent losing what's in the back. Also, notice the cabinets above the fridge. They extend further than the standard cabinet and cover the entire top of the fridge. This is a feature I'd never seen before this planning process, and they do a great job at creating a seamless look. One big regret- we didn't plan a large picture window over the sink. Bummer, that would have been really nice.

The range hood cover is also neat (that's the triangular fixture over the stove top). Notice we opted for the non-traditional stove-oven combo. You see the stove top by itself in this picture, and the double ovens below. Note; Double ovens are pretty, but pricey. Fun in theory, but hard to stomach when making a real-life purchase. We considered reverting back to a traditional stove and oven, but we'd already had our electrician run our oven wiring twice over previous indecision. A third time would be too embarrassing. These ovens better be worth it in the long run.

Another fun feature; the built in bookcase to the left of the too-fancy-for-our-pocketbooks/what were we thinking? double ovens. The counter space below it will serve as a desk or workspace. We'll probably park one of our laptops here for convenient email checking and recipe look-up. There's a special spot for a microwave, which means more counter space for making that chocolate chip cookie dough! See the cabinets on the far right? Our version of a Super Chef. Not as big as others we've seen, but should do wonders compared to the kitchen storage space we've had up until this point.

Here's a close-up showing a glass-faced corner cabinet (there's a better picture below). We don't know if we'll be able to afford this now, but maybe down the road some day. It would create an angle that would make for a more natural and smoother end to the wall of cabinetry. Also, it would face into the dining room, so it would be a nice decorative element that you'd see while sitting down at the dining table. (You don't see it on this drawing, but our dining room door is to the right and opposite of the corner cabinet.)

And here's another 3-D drawing of pretty much the same plan. This wasn't intentional, but it looks like it's being shown with our bamboo flooring. Notice the painted island. We might wait on this for the sake of affordability, but we're interested in including a white or ivory element. I love the nice contrast against the dark wood cabinetry.

Here's a better representation of the angled corner cabinet

So, we're in the process of exploring a couple more options now; taller base cabinets (for us tall people), and a kitchenette for the basement that we hope to use as an apartment for family and friends and possibly for a hunting rental. And of course there's still the counter tops... We're still vacilating betweeen granite, Corian, and Quartz, and then within each of those there's the myriad of colors to chose from. I'm thinking a light, creamy color that will contrast nicely with the espresso. But I could be talked into something a little more coffee-inspired...time will tell. We're also still finalizing the hardware for the cabinetry. But we'll be ready to place the order for the cabinets soon! Finishing this kitchen is the last big step in getting the house ready for us to move in, so needless to say, it's exciting.

More to come on cost, appliances, counter tops, and other fun details as they unfold!
Related Posts Plugin for WordPress, Blogger...